Stuff that occurs to me

All of my 'how to' posts are tagged here. The most popular posts are about blocking and private accounts on Twitter, also the science communication jobs list. None of the science or medical information I might post to this blog should be taken as medical advice (I'm not medically trained).

Think of this blog as a sort of nursery for my half-baked ideas hence 'stuff that occurs to me'.

Contact: @JoBrodie Email: jo DOT brodie AT gmail DOT com

Science in London: The 2018/19 scientific society talks in London blog post

Showing posts with label crafts. Show all posts

Saturday, 24 December 2022

Last-minute Chrismas gifts and activities that are emailable or printable or bakeable


Depending on where you live there may well be a smaller shop open for emergency snacks. Where I live in Blackheath we have Best One Xpress open in the village (24 hours) and Pravin Supermarket in Blackheath Standard is open from 10 until 3pm. I hear that Deliveroo is likely to be up and running too. 

Here are some ideas for gifts that don't require leaving the house or having them delivered. If a gift for someone hasn't arrived then you can draw or print or email something to give to someone that indicates that something mysterious and delightful is on its way, just currently delayed.

1. Annual Memberships or pre-paid events / courses

I'm a member of the Royal Geographical Society (UK-wide) and a couple of London cinemas. Possibly buying someone a gym membership at Christmas might be a little pointed but perhaps a cookery or photography class or something nice like that, or art gallery membership etc. 

You can buy a ticket for a future event and print out the email to give to someone, or email it to them.

2. Gift cards / book vouchers / iTunes vouchers etc / magazine subscriptions

These can be bought online (you get an e-voucher with Amazon or iTunes) or in shops if you're able to get to one.

3. Bake biscuits / cakes

This one does require a trip to the shops for supplies but works quite well as a last-minute thing if you have a box (cake) or paper bag (biscuits) to put the end product in. Recipes abound on the internet. If you don't have a handy gingerbread man cookie cutter you can cut one out of paper and then place it on your biscuit dough and cut around it with a knife.

Gingerbread men recipe: https://www.bbc.co.uk/food/recipes/gingerbread_men_99096 and see at 3m in this video how to cut out shapes without a cutter.

4. Make salt dough decorations

Pretty much as above, but non-edible (too salty!).

Recipe: https://www.bbcgoodfood.com/howto/guide/salt-dough-christmas-decorations


5. Printable decorations and colour-in activities

TES (formerly Times Educational Supplement) has all sorts of Christmas Craft activities for kids, many of which are free. Some also have a bit of curricular learning in there too but this one is just for colouring in.

Free DIY ornament: https://www.tes.com/teaching-resource/free-christmas-ornament-template-11752205

For work I've also made a Christmas Computing zine (A4, folds into a tiny booklet) and a HexaHexaFlexagon (never stops folding!), free: https://www.tes.com/teaching-resources/shop/JoBrodieCS4FN

Etsy is full of (paid for) printable things to colour in and decorate, including colouring-in placemats to keep kids occupied while at a table. Be careful about bleed through onto your table if using coloured pens. After you've paid you'll be sent a link to download a digital file which you can then print.

Gingerbread house by ArtbyEmilySkinner (A4): https://www.etsy.com/uk/listing/1112628257/gingerbread-house-printable-paper-craft

Merry Christmas colouring in placemat (A4): https://www.etsy.com/uk/listing/1106059506/merry-christmas-colouring-and-activity

Search for more Christmas printables: https://www.etsy.com/uk/search?q=christmas+printables

Note: some products are aimed at a US audience and so print out on US letter size which is slightly different from A4 size. Look for products that are tailored for A4 sizing, or that come in PDF form (which you can just shrink slightly and cut off the extra). 

A4 = 8.27 x 11.7 inches (210 x 297 mm)
US letter = 8.5 x 11 inches (215.9 x 279.4 mm)

If you have a Rymans near you they will print items for you (£2.50 set up charge then approx 30p per A4, or a bit more for A3). Other printers are also available of course, though they'll be shutting soon.

We have lots of printable activities / colouring-in sheets / puzzle sheets, all with a computing theme here: https://teachinglondoncomputing.org/christmas-computing/

6. No printer but have a computer?

Here are versions of our puzzles and colouring in sheets which can be done on a computer :)
https://teachinglondoncomputing.org/2022/12/12/snow-day-no-printer-needed-computing-themed-activities-for-those-at-home-snowday-uksnow/

If you like magic we have lots of free booklets you can download and read as a PDF, plenty of tricks involve a pack of cards: https://cs4fndownloads.wordpress.com/magic/


Saturday, 28 December 2019

How will you celebrate Buntingmas? Craft ideas and classroom activities.

Updated links for #Buntingmas 2023 on Tuesday 11 April 2023.

Original post
Buntingmas (or The Festival of Bunting) is a thing I invented in 2019 to celebrate bunting. The first Buntingmas is on Saturday 11th April 2020. I'm still working out the details ;)

https://twitter.com/JoBrodie/status/1200522305295790082


While I'm not particularly pro-monarchy (I don't much mind them) I remember greatly enjoying the 'floribunta' that bloomed across UK high streets in 2011 when one of the royals got married. 

Tom Scott created Buntify the internets, a bunting overlay for websites that wanted to do do their civic bunting duty. It was a bit of fun that let you add bunting and a patriotic jingle to any website. There were even bunting fights in supermarkets as they ran out of the tethered celebratory flags. Then in 2012 we had all the Olympic bunting so there were a couple of years of fairly heavy bunting exposure.

https://twitter.com/my53rdchoice/status/616979930031747072


The very simple aim of Buntingmas is to 'put up' some bunting in whatever way 'put up' is relevant for you. If you hate bunting don't do that and instead you are merely encouraged to 'put up with' bunting.

I think of the 'type specimen' of bunting as a series of fabric pointed flags strung together but it's up to each individual Buntingmas celebrant to decide what sort of flags, pennants or other types of bunting to use.

1. Craft options
2. Classroom activities and other educational opportunities
3. Other posts I've written about Buntingmas

4. Gallery of my favourite bunting

1. Craft options
These might include paper/card and string bunting, knitted or crocheted bunting as well as the more classic fabric bunting creations. There's also bunting jewellery made of polymer clay, bunting 'toppers' to stick on cakes or fondant edible bunting as in the video below. Sometimes there are bunting making classes / workshops.


Or you can just buy bunting.

2. Classroom activities and other educational opportunities
While bunting has a celebratory air about it, the wider use of flags as a communication tool is pretty fun and interesting.

  • Signal flags and codes in the classroom
  • How to teach semaphore using flags
  • For younger classrooms each child could make a 'personal flag' (including stuff on it that they feel best represents them) either to decorate the room or take home. The instructions suggest getting other classmates to guess who created each flag.

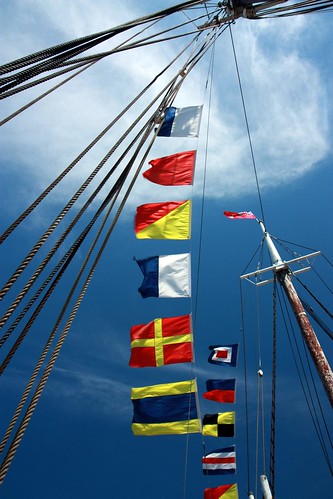
The photo of the flags on a boat below actually spell out 'Welcome Aboard', using the code of the international maritime signal flags. I have a tea-towel with the signal flags info on it (Mr Brown also wears an apron with the pattern on in Paddington 2).


3. Other posts I've written about Buntingmas

Heraldic shields to print and colour in for #Buntingmas (8 April 2022)
#Buntingmas 2022 - basically let's all put a bit of bunting up (3 April 2022)
Vaguely Celtic 'bunting' for Buntingmas made from acetate OHP sheets and glass paints (11 April 2021)
Make your own heraldic bunting for #Buntingmas (10 April 2020)
An even easier way to make bunting from folded paper - no printer needed #Buntingmas (9 April 2020)
#Buntingmas (it's 11 Apr): How to make low-tech bunting from paper (1 April 2020)


4. Gallery of my favourite bunting
All photos taken by me, most are on Twitter.


Mini-bunting above comes from Tiger in Lewisham, though it has shops all over the place. This bunting is permanently installed above my kitchen door. Tiger / Flying Tiger occasionally also sells mini bunting as well as larger garlands.


I created the above space-themed bunting using laminated paper (designed on PowerPoint, with images added). It tells the story of the film I'm screening (The Dish) at the 2018 Charlton and Woolwich Free Film Festival. The bunting is attached to one of the guy ropes holding up the open air screen set up in the grounds of Charlton House. My boss' son now owns this bunting. (I also made some work-themed bunting for my boss' office).


Imagine all this bunting whiffling in the breeze at the 2017 Wilderness Festival. Someone had festooned the Information Tent with colourful bunting making it very easy to find.


This is a lantern I made for the Dec 2018 Blackheath Village Day at the bunting making workshops held in Blackheath Halls / Conservatoire. The logo / theme of BVD is actually bunting (!) so I adopted that for the theme of my lantern, lit with a battery-operated tea-light.


Bunting in the colour of the Ukrainian flag, patterns available to download: Heraldic shields to print and colour in for #Buntingmas (8 April 2022)


Saturday, 5 November 2016

I've made a lantern with sticks of willow and strong tissue paper

 Willow lantern-making workshop in Pinner - the final results, in a Pinner garden

Pinner is admittedly quite far from Blackheath (Charing Cross to Marylebone, fast train to Harrow on the Hill then 183 to Pinner works well but Pinner's also on the Metropolitan line, zone 5 (Watford trains stop there)) but if you happen to live a bit nearer than me then you might like to know that they sometimes do fun craft things at the Heath Robinson Museum which is in West House above Daisy's Cafe. This can be found at the far end (if you're coming from the station) of Pinner Memorial Park. The park is unlit at night so I recommend bringing a torch as the path is surrounded by trees so visibility is minimal. It's quite spooky!


On Thursday 3 Nov it was make your own willow lamp; these are lit either by a tealight or by a battery operated version.


I wish I'd taken a photo of the bushel of willow sticks tied up, it was quite impressive, possibly taller than me. You can buy them in stacks of about 250 (they're actually sold by weight rather than by number) from a variety of places, the class tutors recommended Somerset Willows (whose website is fascinating with lots of pictures of the process of growing, harvesting and preparing the willow sticks).

Dry willow sticks are still reasonably malleable in that you can, with a couple of firm thumbs, straighten them a bit and I think our tutors (the lovely Harinder and Kam who were fab and helpful) must have done quite a bit of pre-work on our ready-cut sticks so that we started the evening with some nice straight bits of willow.

The order of play is -
  1. Make a triangular platform for the tealight so that it can sit in the middle of the finished item
  2. At each corner add perpendicularly a willow stick so that a bit pokes out the bottom, raising the platform off the ground
  3. Towards the top add three smaller lateral sticks to provide a 'side' on which to stick the paper
  4. Add a sheet of wetted/glued paper to each side, add decoration, add another sheet of paper
  5. Quaff Prosecco and finger food, tidy up, let your lantern dry at home

The first thing we made is a strong triangular base on which the tealight will sit and once that's done it's tied to three sticks at each corner which are then brought to a point at the top. In the picture above you can see the white paper is attached on each side to a sort of A-frame - the bit at the bottom is the tealight stage and the smaller one at the top is added last (once the three vertical sticks are tethered at the top).

We used masking tape to construct the entire thing - it's much easier to tear of lots of two inch strips beforehand and stick them to a table. Then to bind the sticks together we split the masking tape bits lengthwise and folded the tape around the join, pushing in the tape to be as snug as possible. As masking tape is very flexible and 'flattenable' it's really good for this so we smoothed off our joins so they were quite neat. The trick is to leave a bit of stick sticking out then cut off the excess as it's much easier to join than trying to stick together two ends of wood.

Once we'd made the tealight platform we trimmed off the sticky-out bits from the bit the tealight sits on (but NOT the background triangle - for that we wait until the whole thing is constructed and has dried) and covered the ends with more masking tape.


The tealight is pretty light (ha!) even with a battery in so any platform will do.


Taking 3 longer willow sticks we lashed them perpendicularly to the tealight platform so that the platform was a few inches off the ground, then bound them at the top after deciding how tall we wanted the finished lamp to be. We spent a fair bit of time beforehand getting these to be reasonably straight and then did the perpendicular lashing.

The penultimate stage was to add to each side near (but not at) the top another shorter willow stick so that we had something to stick the tissue paper too.

Then we cut out some wet-strength tissue paper so that it was slightly larger than our A frame, and covered both sides in glue (50% water, 50% PVA glue) using the soft side of a dish-washing sponge dipped in the glue. This bit gets quite messy and a plastic-coated table cloth is a fantastic investment here! PVA glue peels off quite nicely from your hands once dried though (or you can just wash it off).

With care, place one sheet over one side of your lamp and cut so that it is just slightly larger. Stretch it taut over the frame (it will be even more taut when dry). This bit is quite fiddly and you need to roll it over the round willow stick but don't need it to fold back on itself inside (because you'll see all the joins once lit from within so the plan is to try and avoid any!). Same with the top and bottom, trimming away the excess and using the dipped spong add more glue where it contacts the willow. Repeat on all three sides.

We used leaves as decoration - again these are coated in glue on both sides and positioned on the tissue, then a second layer of tissue is added on top. Ideally try and get this taut from the get-go so that you minimise air bubbles and wrinkles, but good luck with that, especially if you've had a glass of Prosecco ;) I did my best!

Two sides of the nearly finished lamp showing leaves (once gently lit
you can see their colours, it doesn't look like a black silhouette).
 
Once you've put on six layers of tissue (two per side with a decoration in the middle, for which you can also regular coloured tissue paper as the colour of whatever you add will come through fine, even leaves) you can cover the masking tape with raffia fibre to finish things off.

Tidy up and wash your hands, walk home with a willow lamp and let it dry overnight. Then you can prune the ends with secateurs, tie the top (cover the masking tape) with raffia fibres, stick a battery in your battery-operated tealight and tell visitors how you came by your one-off piece of art :)

 Mobile phone acting as torch!

The next event, at time of writing, is monoprinting on Mon 7 November and a Christmas print workshop on Thur 1 Dec, both £25 with glass of Prosecco and finger-food. It looks like they do crafts on the 1st Monday and Thursday of every month.

Post-script: it's possible to make willow lanterns at craft workshops all over the place but I'm particularly glad I picked this one in Pinner as it afforded me what turned out to be the last opportunity to see my dad alive. We spent a lovely day together on the Friday (4th) before I headed off to the Royal Albert Hall for Jurassic Park Live. He rang me on Saturday morning shortly before I published this and we had a chat before he headed off to the shops, but he collapsed and died rather suddenly on the way back. To be fair he'd have been delighted at the manner of his death though - quick and painless, but the lamp will always be a bittersweet reminder.


Saturday, 19 March 2016

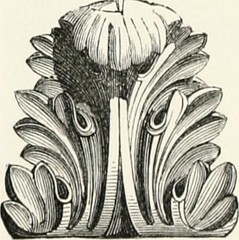
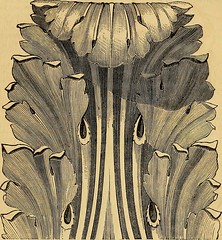
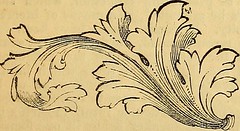
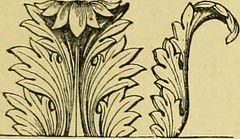
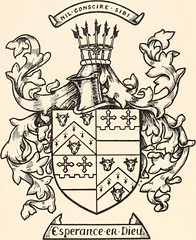
Acanthus leaves (ridiculously curly things that appear in William Morris-style crafts) in art and heraldry

Image from page 153 of "An illustrated dictionary of words used in art and archaeology. Explaining terms frequently used in works on architecture, arms, bronzes, Christian art, colour, costume, decoration, devices, emblems, heraldry, lace, personal orname

Big fan of idealised acanthus leaves. Big big fan. They're absolutely everywhere yet it's only recently that I realised I'd not come across much instruction on how to draw them from scratch. I assume designs would have been passed on to apprentices and so on, although I'm sure plenty of clever / lucky people can draw them freehand.

As far as I'm aware most reasonably complex artforms, particularly those that are designed to fit in a particular space, are designed from the ground up with an underlying 'scaffold' upon which the final form is drawn. This is how (it is believed that) Celtic knotwork was created, or at least it is possible to reconstruct this type of art using simple mathematical grids, building up to a full pattern. In fact I did this myself a couple of weeks ago at a 'crafternoon' with friends, using George Bain's 'Celtic Art: the methods of construction' (the edition linked to is a later one than mine) to create a copied pattern from scratch. It was the scaffolding that was actually copied, measured and scaled up to fit a particular space, then the final pattern emerged from the gridlines. You can see the photos of the work in progress and its final form on my secondary blog here.

I've not found a user-friendly equivalent of the Celtic knotwork book for acanthus leaves, though there is a detailed digitised book of yore that explains how it was done. I've not really got to grips with it. Some examples of acanthus leaves in art and heraldry are below, taken from the amazing Internet Archive Book images of out-of-copyright image resource, click on the image below to visit its page on Flickr and there are further links there to see it in its original context.

There are a couple of instructional drawing videos below and 'how to draw' books and blog posts I've found so far. More examples of acanthus art are further below.

Acanthus drawing instructions

How to draw the Acanthus, Part I // Part II // Part III / Part IV, Surface Fragments blog

Guide for the drawing of Acanthus, and every description of ornamental foliage
(1843), James Page
Google Books // Google Play (same thing, formatted differently, probably suitable for Android!) / Internet Archive version

Calligraphy design: acanthus leaves, Calligraphy Pen blog - simple instructions for turning a slightly wiggly line into something rather lovely. And another method for Acanthus Drawing

General guidelines for drawing an acanthus leaf (PDF) from Mary May's woodcarver journey blog on 'acanthus leaf step by step' - this one is the multi-lobed straight leaf form.

Acanthus leaves
Twirling Ribbons and Twirling Acanthus Leaves
Painting acanthus leaves: Instruction from the Göttingen Model Book
Using freestyle acanthus leaves

art+works blog series
 How to draw an acanthus leaf - picture from V&A collection, not actually that instructive


See also this heraldic stone carving time-lapse video showing acanthus leaves being carved from portland stone for the Holywell music room in Oxford.


More acanthus examples

William Morris 'Acanthus' wallpaper, example from V&A collection

Acanthus A5 sketchbook, from William Morris gallery shop

Filigree, flourishing, mantling - a reference on Pinterest 

Wikipedia - Acanthus (ornament)


Image from page 122 of "The Decorator's assistant" (1847)

Image from page 70 of "The Decorator's assistant" (1847)

Image from page 226 of "The standard cyclopedia of horticulture; a discussion, for the amateur, and the professional and commercial grower, of the kinds, characteristics and methods of cultivation of the species of plants grown in the regions of the Unite

Image from page 309 of "Armorial families : a directory of gentlemen of coat-armour" (1905)

Acanthus leaves feature very heavily in heraldic mantling (the bit next to the crest which is above a coat of arms) though other similar-looking stylised leaves are also involved.