Every so often I answer (the) questions (that I can answer) about Twitter and following today's discussions I thought I'd try and answer any Twitter-related questions for the next half hour or so. Obviously I don't know everything about Twitter (!) but if you also add the hashtag #TwitterHelp then this increases the chance that someone else might see it and produce an answer. Anyone seeing a tweeted question that they can answer should answer it, is my basic policy.
I'll include Qs and As below (anonymously).
If everyone's out at the pub or watching television then there won't be any Qs or As below :-)
--------
Showing posts with label howto. Show all posts
Showing posts with label howto. Show all posts
Monday, 29 February 2016


Monday, 4 January 2016
An index of the 'how to do stuff' blog posts
I've written over 50 posts which explain how to do something - they are all labelled 'howto'.
To be honest most of them are just to remind me which sequence of key clicks will let me do something I'm currently struggling to do (often on Excel or Word). Some of them are how to do things with Twitter, though many of those go out of date fairly quickly after writing them.
In the list below I've ordered them thematically rather than by date. Even older posts may be of value as I do go back and add in updates.
This is probably the point at which I have to admit to having a separate WordPress blog called 'How to do various techy things' which updates or goes into more depth on some of the stuff below, and some additional stuff too. It's very Twitter heavy at the moment. You can see the curated / thematic index here, or the full sitemap here.
Posts you can find on THIS blog.
Twitter-related posts
WordPress.com
I've no idea how to do the .org thing I'm afraid, never used it
Word
Mac wrangling
If I'm honest, I hate Macs. Love iPhones. Just massively prefer PCs for doing stuff, sorry Mac fans.
Excel spreadsheets
Powerpoint / presentations
Dropbox
Google Drive posts
Miscellaneous
Posts with me as the intended audience
Doing stuff on websites
To be honest most of them are just to remind me which sequence of key clicks will let me do something I'm currently struggling to do (often on Excel or Word). Some of them are how to do things with Twitter, though many of those go out of date fairly quickly after writing them.
In the list below I've ordered them thematically rather than by date. Even older posts may be of value as I do go back and add in updates.
This is probably the point at which I have to admit to having a separate WordPress blog called 'How to do various techy things' which updates or goes into more depth on some of the stuff below, and some additional stuff too. It's very Twitter heavy at the moment. You can see the curated / thematic index here, or the full sitemap here.
Posts you can find on THIS blog.
Twitter-related posts
- How to use Storify - it's not Twitter of course, but it's often used to gather together a lot of tweets. My first blog post of 2016. Note that tweets added to Storify will stay there even if the original sender later deletes them.
- Spambots that favourite random tweets on Twitter - a possible (gradual) solution - would definitely work but didn't really come to much cos Twitter seemed to fix the problem
- RSS to Twitter - turning website updates into automated tweets, with IFTTT - examples might include a new job advert added to a website, if the site has an RSS feed for updates you can get them sent to Twitter and view them there along with other news feeds. The example I've used here is for making new film music concerts (added to a film music concert website) more obvious on Twitter.
- Sharing a link to a tweet may now notify that person, some suggested workarounds - this is very visible on desktop Twitter (shows up as a notification) though it's completely absent on Echofon
- April 2014, finding hashtagged tweets from November 2013 - a case study - finding old tweets on Twitter used to be really difficult, now it's really easy, hooray.
- It is not possible to view private tweets but here's what to be aware of to protect your account - one of my most popular posts which has taken on a life of its own, I assume it's showing up in Google searches as all the traffic comes from that.
- Three fairly cool things you can do on Twitter (apart from tweet, obviously) - I just had a quick look, this is pretty decent even if I do say so myself ;)
- Useful posts about Twitter - a collection - some duplication with other posts mentioned in here
- Twitter's new photo preview just takes up more space - here's one partial solution - one of those posts written when Twitter's gone and changed something else that annoyed lots of people. I suspect we've all got used to it now.
- How to send and receive web addresses via Twitter DM - break the URL - an imperfect fix - Twitter solved this problem itself so this is no longer relevant however it's also useful if you want to send someone a link while cloaking it a bit (though it makes more sense to email it if you want to be that stealthy!)
- How to remember who tweeted that article when you want to give them credit later - clicked a link from someone's tweet, left it open in a tab, read it hours later? Me too.
- How to trap tweets in a hurry - for those times when someone's doing something dodgy on Twitter and you need to capture the evidence, ideally before they delete it.
- Thwarting spammers on hashtag livetweeted events - basically use the minus key to run a search that excludes terms or URLs the spammers are using
- Using free tools to capture a handful of tweets or a larger bunch - possibly a bit out of date now
WordPress.com
I've no idea how to do the .org thing I'm afraid, never used it
- How to create a clickable image for Wordpress dot com sidebars - I use this for advertising events. These are generally more visible on the desktop version of blog posts though.
- How to make it look like you've embedded a short Storify into a free Wordpress dot com blog post - right, the challenge here is that WordPress won't let you embed a Storify (or didn't the last time I tried it). If your Storify is manageably small then you can cheat by embedding the embeddable elements (tweets) and inserting screenshots of things with pictures in them (and hyperlink them to the original thing). It looks pretty good I have to say.
- Will it embed? How to embed all sorts of things on free Wordpress dot com blog posts - lots of things won't embed in WP, here are the ones that will and how to get them there.
Word
- More Word glitches solved - troublesome HYPERLINKs and apostrophes
- How to get rid of white space / line breaks in Word - when you've copied formatted text from elsewhere and find it's added in a whole bunch of crap
- How to get rid of lines in Word (Microsoft Word 2010) - another hugely popular post. Ctrl+Q is probably what you're after, or select / copy and paste the text into a plain text document to wipe out all the formatting and then reformat. This one has a lot of comments which vary from the really polite and enthusiastic to the amazingly rude. I'm used to that sort of level of rudeness from homeopaths and other quacks who've been challenged, not used to it on techy posts ;)
- How to stop Word 2007 / 2010 (y’know, ‘new’ Word) capitalising words - not at all popular this one, I suppose everyone's worked it out now, but in case you haven't...
Mac wrangling
If I'm honest, I hate Macs. Love iPhones. Just massively prefer PCs for doing stuff, sorry Mac fans.
- How to copy and paste file paths in Mac Finder - not that you can do much with it. Unlike on a PC.
- I've got a new Mac, stuff I've been learning about it - basically spending ages trying to find out how to do stuff I could do easily on a PC ;)
- How to take screenshots - on PCs, Macs and iPhones
Excel spreadsheets
- How to turn two columns in Excel into one without losing contents - concatenate not merge - I've actually discovered an even simpler way of doing this, you can actually write =CONCATENATE and then pick what you want to merge. If it's FIRSTNAME SURNAME going to a single NAME column you have to remember to include a " " between the names.
- How to search across all tabs in an Excel workbook spreadsheet - brilliant, such a time-saver, so glad I discovered how to do this! I asked on Twitter and helpful folk answered.
- How to make sequential numbers appear in Excel - embarrassingly easy. Impossibly impossible if you just don't know how to do it of course.
Powerpoint / presentations
- If you give talks with slides you must do this one thing - because I have commanded it :) Please make your links friendly -
- How to embed audio in PowerPoint presentations and convert m4a to mp3
- How I prepare presentations for giving talks - not a 'howto' techy post as such, just some background on the preparation I do when giving a short talk or hour-long lecture
Dropbox
- Using the address in a public Dropbox folder to find other files also shared - mildly forensic, I suppose.
- How to enjoy media files on iPhone without using iTunes (and using Dropbox instead) - I was pretty happy when I discovered how to do this.
- How to share your Twitter archive via your public Dropbox - it's easy to do but it doesn't mean that you should (while all tweets from a public account are obviously public and visible you are 'surfacing' tweets that might not otherwise be that noticeable).
Google Drive posts
- How to make a Google Fusion table map (ie a zoomable map of addresses) for Sherlock special cinemas - making these maps is such fun
- Alt+Shift+5: How to strikethrough text on Google Drive (Google Docs as was) - Option+Shift+5 for Macs - turns out this is a hugely popular post, not sure why
Miscellaneous
- How to avoid deleting stuff and how to recover from it - at a fairly basic level I think - probably out of date now, think of it as a living history of how we used to recover from system crashes etc.
- Finding things that aren't there any more on the internet, and storing things that are - can be quite useful
- How to turn one PDF file with 10 pages in it into 10 files with one page in them - easy on Macs with preview, but can also be done on PCs using a nifty Chrome tool.
- How to create a thumbnail of a website using Paint and PowerPoint - quite fun
- How to grab the search results URL from NCBI PubMed - it seemed surprisingly fiddly until I found out how to do it!
- Fairly useful pages on the internet - a collection of tools I've found handy
- What is a misleading homeopathy claim, and how to report it to the ASA - uses the example of homeopathy but is applicable in any situation where an organisation is making misleading advertising claims
Posts with me as the intended audience
Doing stuff on websites
- Worked example: redirecting some pages on the work website
- Memo to self on how to set up a page redirect on a website
Friday, 1 January 2016
How to use Storify
Adapted and updated from "Some ways to use Storify - curate an archive, add context, tell a story" published on FreePint on Thursday 1 September 2011. Also, as this is my first post of 2016 - happy New Year! :)
This is a detailed 'long read' post, if you're after a briefer overview please see How to use Storify like a pro to collect tweets over on my dedicated 'how to do techy things' blog.
Storify is a tool that lets you thread together individual tweets (and also capture them for posterity, even if deleted) to form a story or record of a discussion. You can also capture any individual 'bit' of social media including an Instragram photograph, a blog post, a YouTube video etc. Once published you can share your Storify as a link on Twitter or even embed it into a blog post (except free Wordpress.com which doesn't let you do that) or you can keep the story as a private draft copy. The free Storify tool has changed a lot since I first wrote the above article and I thought I'd update it with some new screenshots.
Visit Storify at http://storify.com. The first thing to do is to log in or create an account - if you've never used the service before you might need to use the green 'Sign Up Free' to start (I honestly can't remember) but you could also try the pale blue 'Log In' button on the top right to log in with Facebook or Twitter accounts.
Table of Contents
1. Logging in
Images: click on any image to enlarge it, then look for an X on the page to close it and return to this post or use the back button on your browser.
 Figure 1. This is the start screen at http://storify.com


2. Starting a new story
As I'm logged in already to Twitter I clicked on the 'Log In' option on the first page and then 'Login with Twitter' on the second - this lets me authorise Storify to use my Twitter credentials.
Then I'll see a page like this
 Figure 4. All my Storify stories.
The options available to me (as a non-paying user) are 'All', 'Drafts', 'Published' and 'Edited'. You can also publish a private Storify to share with selected people, but not without paying.
On the top right of the image above 'New Story' will create a fresh editing window with a whole load of icons on the right hand side.
 Figure 5. The two-panel editing window.
The editing window is split in two. On the left is where you create your story. On the right is where you search for and select what you'll put in it.
3. Twitter and other social media services
The icons on the right let you filter your search for social media items by different services.

Figure 6a. Storify: all the options
The options are
Each icon has its own sub-options, which are grey icons or text below the larger grey icons, and some examples are shown below


4. Twitter in depth: adding tweets to your Storify
I think most people probably use just this option alone and collect a bunch of tweets from a user, a conversation or a hashtag. To do this click on the Twitter icon and then search for a hashtag or a user (you can search their name to see tweets sent to or from them, or use from:username just for those they sent [or use the 'User' option].
Pro tips:
(1) When you search, eg for the hashtag #twitterhelp, Storify will show you 50 results which you can transfer into the editing pane on the left. Don't do this yet. Scroll to the bottom and choose the 'Show more results' (and keep doing this until Storify stops producing more tweets). It's best to get the maximum number in this right hand pane before transferring them. If you transfer your first 50 you have to re-run the search to find more (and you end up duplicating).
(2) You can eliminate unwanted tweets (eg spam tweets, spam links, irritating users etc) by subtracting them from your search - eg #twitterhelp -jobrodie would bring up tagged tweets that everyone had sent except me.
(3) If you're just after a few tweets select the ones you want from the results on the right but if you want large numbers it's probably easier to move all the results into the left pane and then delete the ones you don't want.
(4) Caution: be aware that publishing your Storify may alert one or more of the people whose tweets you've included, even if you don't share a link to your story. People can sign up to Storify and may receive an email alert if one of their tweets is used. If you prefer not to make this obvious then keep it as a draft (or pay to publish it privately). In order to save or publish your Storify you'll need to give it a title.
If your Storify will contain only tweets then you're pretty much done unless you want to refine things a bit by re-ordering the tweets (so the earliest appears first rather than reading backwards in time) or adding in a bit of context.
Adding context with a text box
Note that this is best done after re-ordering.
Click between any two tweets to bring up a text box that lets you write and format text. In the picture below there are formatting options that appear when you select some text.

Figure 9. Adding commentary: inserting a text box
Re-ordering the items
You can click and drag any item up or down and drop it somewhere else in the list - the collapsed view is particularly good for helping with this. You can also automate this by clicking on the Reorder button (shown below, next to the Collapsed view option) and pick which you prefer. I'm a fan of reading the things in the order they were posted so tend to prefer the 'Reorder by oldest first'.
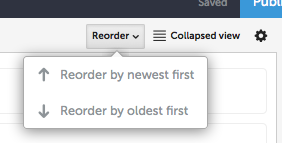 If your Storify contains a conversation happening among more than two people it's possible that tweets sent later will be in response to an earlier tweet - you can manually move these up or down to maintain the threads.
Caution: if you have added a text box during editing Storify will treat is as a recent item and reordering will move it away from the tweets or section that you originally placed it in. I recommend doing any reordering first, then adding in supplementary text.
5. Using the Embed link / Embed URL icon
This is a really useful option and I think it of it as a sort of override button when all else fails. You will find when searching Storify for tweets that many won't appear. This is because the search on Storify doesn't go as far back in time as Twitter.
This doesn't matter because you can find the tweet on Twitter.com (desktop is best for searching), then copy its URL over to the Storify. Every tweet has a timestamp and its URL can be found by hovering over that and copying the link (right click / copy link location).
Similarly every Facebook post has its own timestamp from which you can collect the link (you'll only be able to use it though if the post is set to be public) and every Instagram picture has its own link too. These links can be pasted into the embed URL search bar and the 'item' should appear for you to drag into the appropriate place on the story.
6. Setting the main image icon
By default Storify will use whatever image appears at the top of your story, so if someone's tweet has a picture in it and that's at the top of your story that's the one that'll get used.
You can pick a different picture, but you will have to publish the post first to do this.
a) Publish your post
It's the blue button with 'Publish' on it!

b) View your published Storify story
Click on the green 'Published' button that replaces the orange 'Draft' button. That tiny down-arrow will unfurl a menu from which you can select 'View Published Story'.

c) Choose a different image
Hover over any image, or item that contains an embedded image and some options will appear to the right. If you see the third grey icon in the options to the right of the picture (third one below, looks cunningly like a picture) then you can click that to select that particular image as the one that will appear at the top. Were someone, perhaps you, to add the link to your Storify story on Facebook etc then that's the image that will now be associated with it.


7. Things to be aware of - a round-up
a) The content (a tweet, the abstract of a blog post) added to Storify will remain there even after it is deleted from the main service.
b) If you add a lot of tweets and decide to reorder them do that bit before adding in any other commentary, otherwise you'll reorder your commentary out of the order you wanted it in
c) Publishing a story is a public act even if you don't tweet out the Storify's link or share it anywhere. Anyone who has previously used Storify themselves may be notified, by email, that one of their tweets etc has been used in your Storify so they may hear about it. If in doubt, keep it as an unpublished draft.
This is a detailed 'long read' post, if you're after a briefer overview please see How to use Storify like a pro to collect tweets over on my dedicated 'how to do techy things' blog.
Storify is a tool that lets you thread together individual tweets (and also capture them for posterity, even if deleted) to form a story or record of a discussion. You can also capture any individual 'bit' of social media including an Instragram photograph, a blog post, a YouTube video etc. Once published you can share your Storify as a link on Twitter or even embed it into a blog post (except free Wordpress.com which doesn't let you do that) or you can keep the story as a private draft copy. The free Storify tool has changed a lot since I first wrote the above article and I thought I'd update it with some new screenshots.
Visit Storify at http://storify.com. The first thing to do is to log in or create an account - if you've never used the service before you might need to use the green 'Sign Up Free' to start (I honestly can't remember) but you could also try the pale blue 'Log In' button on the top right to log in with Facebook or Twitter accounts.
Table of Contents
- Logging in
- Starting a new story
- Twitter and other social media services
- Twitter in depth: adding tweets to your Storify
- Using the Embed link / Embed URL icon
- Setting the main image icon
- Things to be aware of - a round-up
1. Logging in
Images: click on any image to enlarge it, then look for an X on the page to close it and return to this post or use the back button on your browser.
 Figure 1. This is the start screen at http://storify.com
Figure 2. This is the option you see once clicking on the green button on the start page.

Figure 3. ...and this is the option if you click the pale blue 'Log in' option on the front page.
2. Starting a new story
As I'm logged in already to Twitter I clicked on the 'Log In' option on the first page and then 'Login with Twitter' on the second - this lets me authorise Storify to use my Twitter credentials.
Then I'll see a page like this

The options available to me (as a non-paying user) are 'All', 'Drafts', 'Published' and 'Edited'. You can also publish a private Storify to share with selected people, but not without paying.
On the top right of the image above 'New Story' will create a fresh editing window with a whole load of icons on the right hand side.

The editing window is split in two. On the left is where you create your story. On the right is where you search for and select what you'll put in it.
3. Twitter and other social media services
The icons on the right let you filter your search for social media items by different services.
Figure 6a. Storify: all the options
The options are
- Storify (selected in the picture above)
- Embed URL - this one is really useful
- YouTube
- Gifs
- Flickr
- Getty Images
- Google search
- Soundcloud
- Tumblr
- RSS feed
- Google+
- Disqus
- StockTwits
(note: if your screen isn't set at full width then some of these might appear hidden behind three dots •••).
Each icon has its own sub-options, which are grey icons or text below the larger grey icons, and some examples are shown below
Figure 6b. Storify: the options for Storify search - Search, Saved Elements, Stories, Elements
Figure 7. Twitter: the options for finding tweets - Search, then the others are denoted by icons. Person icon is 'user' so type in username to see their tweets, 'star' to see their favorites. The clock icon shows you your own timeline.
Figure 8. Flickr: The options for searching Flickr include selecting photos with a CC licence and viewing the public photos from any user.
4. Twitter in depth: adding tweets to your Storify
I think most people probably use just this option alone and collect a bunch of tweets from a user, a conversation or a hashtag. To do this click on the Twitter icon and then search for a hashtag or a user (you can search their name to see tweets sent to or from them, or use from:username just for those they sent [or use the 'User' option].
Pro tips:
(1) When you search, eg for the hashtag #twitterhelp, Storify will show you 50 results which you can transfer into the editing pane on the left. Don't do this yet. Scroll to the bottom and choose the 'Show more results' (and keep doing this until Storify stops producing more tweets). It's best to get the maximum number in this right hand pane before transferring them. If you transfer your first 50 you have to re-run the search to find more (and you end up duplicating).
(2) You can eliminate unwanted tweets (eg spam tweets, spam links, irritating users etc) by subtracting them from your search - eg #twitterhelp -jobrodie would bring up tagged tweets that everyone had sent except me.
(3) If you're just after a few tweets select the ones you want from the results on the right but if you want large numbers it's probably easier to move all the results into the left pane and then delete the ones you don't want.
(4) Caution: be aware that publishing your Storify may alert one or more of the people whose tweets you've included, even if you don't share a link to your story. People can sign up to Storify and may receive an email alert if one of their tweets is used. If you prefer not to make this obvious then keep it as a draft (or pay to publish it privately). In order to save or publish your Storify you'll need to give it a title.
If your Storify will contain only tweets then you're pretty much done unless you want to refine things a bit by re-ordering the tweets (so the earliest appears first rather than reading backwards in time) or adding in a bit of context.
Adding context with a text box
Note that this is best done after re-ordering.
Click between any two tweets to bring up a text box that lets you write and format text. In the picture below there are formatting options that appear when you select some text.
Figure 9. Adding commentary: inserting a text box
- H = toggle between making the text a heading or regular paragraph text.
- Clock icon - prints the current date and time.
- Link icon - hyperlink the text with a web address
- Anchor icon - link to a section within the Storify (you'll need to have created one or more H header sections)
- B / I / U /
S= bold, italic, underline, strikethrough.
Re-ordering the items
You can click and drag any item up or down and drop it somewhere else in the list - the collapsed view is particularly good for helping with this. You can also automate this by clicking on the Reorder button (shown below, next to the Collapsed view option) and pick which you prefer. I'm a fan of reading the things in the order they were posted so tend to prefer the 'Reorder by oldest first'.
If your Storify contains a conversation happening among more than two people it's possible that tweets sent later will be in response to an earlier tweet - you can manually move these up or down to maintain the threads.Caution: if you have added a text box during editing Storify will treat is as a recent item and reordering will move it away from the tweets or section that you originally placed it in. I recommend doing any reordering first, then adding in supplementary text.
5. Using the Embed link / Embed URL icon
This is a really useful option and I think it of it as a sort of override button when all else fails. You will find when searching Storify for tweets that many won't appear. This is because the search on Storify doesn't go as far back in time as Twitter.
This doesn't matter because you can find the tweet on Twitter.com (desktop is best for searching), then copy its URL over to the Storify. Every tweet has a timestamp and its URL can be found by hovering over that and copying the link (right click / copy link location).
Similarly every Facebook post has its own timestamp from which you can collect the link (you'll only be able to use it though if the post is set to be public) and every Instagram picture has its own link too. These links can be pasted into the embed URL search bar and the 'item' should appear for you to drag into the appropriate place on the story.
6. Setting the main image icon
By default Storify will use whatever image appears at the top of your story, so if someone's tweet has a picture in it and that's at the top of your story that's the one that'll get used.
You can pick a different picture, but you will have to publish the post first to do this.
a) Publish your post
It's the blue button with 'Publish' on it!

b) View your published Storify story
Click on the green 'Published' button that replaces the orange 'Draft' button. That tiny down-arrow will unfurl a menu from which you can select 'View Published Story'.
c) Choose a different image
Hover over any image, or item that contains an embedded image and some options will appear to the right. If you see the third grey icon in the options to the right of the picture (third one below, looks cunningly like a picture) then you can click that to select that particular image as the one that will appear at the top. Were someone, perhaps you, to add the link to your Storify story on Facebook etc then that's the image that will now be associated with it.
d) Log out
Once you've finished creating, editing, saving or publishing your story you can log out using the tiny little down arrow to the right of your username.
7. Things to be aware of - a round-up
a) The content (a tweet, the abstract of a blog post) added to Storify will remain there even after it is deleted from the main service.
b) If you add a lot of tweets and decide to reorder them do that bit before adding in any other commentary, otherwise you'll reorder your commentary out of the order you wanted it in
c) Publishing a story is a public act even if you don't tweet out the Storify's link or share it anywhere. Anyone who has previously used Storify themselves may be notified, by email, that one of their tweets etc has been used in your Storify so they may hear about it. If in doubt, keep it as an unpublished draft.
Tuesday, 17 November 2015
Worked example: redirecting some pages on the work website
Edit 18 November 2015: this worked

I am fiddling about with the work website - http://www.chi-med.ac.uk and we've moved some bits and pieces around so that the architecture makes sense.
Some of our older links of course now don't work but I still want them to as they're listed on other people's websies already and I want it to be easy / seamless without people having to update their URLs.
According to this website http://www.pa.msu.edu/services/computing/faq/auto-redirect.html I am to create a file in the relevant folder and call it .htacess and then add the line
Redirect /path-of-file-to-be-redirected URL-of-page-to-go-to
That's all very well if it's just one page but I have several, as follows.
Redirect /research/infusionpumps/index.php http://www.chi-med.ac.uk/infusionpumps/index.php
Redirect /research/infusionpumps/architecture/index.php http://www.chi-med.ac.uk/tools/architecture.php
Redirect /research/infusionpumps/hazardanalysis/index.php http://www.chi-med.ac.uk/infusionpumps/hazardanalysis.php
Redirect /research/infusionpumps/hcihumanfactors/index.php http://www.chi-med.ac.uk/infusionpumps/humanfactors.php
Redirect /research/infusionpumps/modelbaseddesign/index.php http://www.chi-med.ac.uk/infusionpumps/modelbasedesign.php
Redirect /research/infusionpumps/verification/index.php http://www.chi-med.ac.uk/infusionpumps/verification.php
Redirect /research/infusionpumps/dataloggers/index.php http://www.chi-med.ac.uk/infusionpumps/dataloggersforensic.php
I don't know if I should add them all in the single .htaccess file, or make an individual file for each page and number them .htaccess1 etc (not even sure if that would work).
Going to find out though...
This is what I'm after

I am fiddling about with the work website - http://www.chi-med.ac.uk and we've moved some bits and pieces around so that the architecture makes sense.
Some of our older links of course now don't work but I still want them to as they're listed on other people's websies already and I want it to be easy / seamless without people having to update their URLs.
According to this website http://www.pa.msu.edu/services/computing/faq/auto-redirect.html I am to create a file in the relevant folder and call it .htacess and then add the line
Redirect /path-of-file-to-be-redirected URL-of-page-to-go-to
That's all very well if it's just one page but I have several, as follows.
Redirect /research/infusionpumps/index.php http://www.chi-med.ac.uk/infusionpumps/index.php
Redirect /research/infusionpumps/architecture/index.php http://www.chi-med.ac.uk/tools/architecture.php
Redirect /research/infusionpumps/hazardanalysis/index.php http://www.chi-med.ac.uk/infusionpumps/hazardanalysis.php
Redirect /research/infusionpumps/hcihumanfactors/index.php http://www.chi-med.ac.uk/infusionpumps/humanfactors.php
Redirect /research/infusionpumps/modelbaseddesign/index.php http://www.chi-med.ac.uk/infusionpumps/modelbasedesign.php
Redirect /research/infusionpumps/verification/index.php http://www.chi-med.ac.uk/infusionpumps/verification.php
Redirect /research/infusionpumps/dataloggers/index.php http://www.chi-med.ac.uk/infusionpumps/dataloggersforensic.php
I don't know if I should add them all in the single .htaccess file, or make an individual file for each page and number them .htaccess1 etc (not even sure if that would work).
Going to find out though...
This is what I'm after
Tuesday, 10 November 2015
Memo to self on how to set up a page redirect on a website
Couldn't get the bit of HTML code that goes before and after another bit of HTML code, that you want to be visible without running as HTML code, to work on Blogger, so a screenshot will have to do. Here's the file with the text below in it for actual copying and pasting purposes. This is really just a blog post for me, to remind me how I did a small thing on the work website in case I want to do it again.
It works perfectly so if you've got neater ways of doing it... alas, I don't care :)
 While we're at it, I can never remember where the local image folder is, it's here
C:\Jo Brodie QM\shared-local-site\images
It works perfectly so if you've got neater ways of doing it... alas, I don't care :)
C:\Jo Brodie QM\shared-local-site\images
Friday, 30 October 2015
How to make a Google Fusion table map (ie a zoomable map of addresses) for Sherlock special cinemas
Note: be careful if you are using this mapping tool when dealing with people's addresses - it is easy to make their data public (uploading to web, sharing with others) without meaning to. In this example the data come from already-public cinema addresses.
I'm looking forward to seeing the Sherlock Special ('The Abominable Bride') at New Year, it's going to be shown on BBC One on New Year's Day but also in cinemas around the world - in Australia, Canada, New Zealand, United States and here in the UK. The Sherlockology website has a meta-list of country pages and more cinemas, and countries are being added (this is the current UK listing).
I thought it would be fun to take the alphabetic list of UK cinemas and put them on a map, that looks like this.


I'm looking forward to seeing the Sherlock Special ('The Abominable Bride') at New Year, it's going to be shown on BBC One on New Year's Day but also in cinemas around the world - in Australia, Canada, New Zealand, United States and here in the UK. The Sherlockology website has a meta-list of country pages and more cinemas, and countries are being added (this is the current UK listing).
I thought it would be fun to take the alphabetic list of UK cinemas and put them on a map, that looks like this.

You can zoom in and out of the map and click on any of the red dots to see details of where each cinema is. For the next update I'll add some colour to mark cinemas that have Dolby Atmos sound systems (the Sherlock special is apparently mixed for Dolby Atmos). Most of the cinemas don't have Dolby systems and of those that do most have 3D or 7.1.
There are four stages to this
a) gathering the data
b) using Google Fusion tables to create the map
c) Troubleshooting
d) ongoing updates and improvements
A) Gathering the data
- make a table that has, at minimum, a list of postcodes or addresses - that's all you need to start
The raw data was here, each line consists of a town or city, the name of a cinema, sometimes a web address and a phone number. These data need to be put into a table which can be done in an Excel spreadsheet or a Google Drive spreadsheet (you can use your Gmail account to log in, there's no requirement to download anything you can do it all online). If you don't want to use either of these then you can upload correctly formatted data in a plain text file: .csv (comma-separated variables), .tsv (tab-separated variables), or .txt (text). I used Google Drive spreadsheets for this.
My current spreadsheet looks like this (click to make it bigger)

I put the cinema name in one column and copied the name of the town / city into another then searched for the cinema's postcode and added those in another column. Postcodes alone are sufficient to create a Google Fusion map (it just takes address data and locates on a map ('geolocated' data)) and anything else you add means that when people click on each point they'll have more information.
It took me an hour and a half (I was having breakfast and watching Frasier at the time so not rushing) to get all the postcodes and have a ready-to-map table, this is really the longest part of the process. Of course you can spend hours tinkering and improving but once you've got to this stage you're ready to go to the next stage, the rest of this section is about 'finessing' the data.
I've added some extra info about the cinemas' websites in two columns. For example there's a generic Odeon websites address but each Odeon cinema also has its own website. There's a column for the Dolby Sound system that the cinema has and I found the information from Dolby's own website. Some cinemas in London are listed under their local name, eg 'Covent Garden' or 'Greenwich' so I created a second column called 'area' and put those locations in there and changed the city to London.
There's also an 'icons' column which I added after making the map above (note that all the dots are red). In the next version the cinemas with Dolby Atmos will have green map-pointers, those with 3D or 7.1 will be blue and the rest in yellow, bit more colourful. It's a work in progress so there'll be more stuff added or refined.
Pro-tip
When filling in information that's currently missing use the filter icon (looks like a funnel) to show only the rows where your item of interest is currently missing. Clicking the filter icon adds to all the column headers a small downward arrow - if you click on it it will present you with a single copy of everything in that column (eg in the 'City / Town' column London features several times but will show up just once in the filtered list). You can then select, or deselect to show only what you're interested in and the rest will be temporarily hidden. Just click the filter icon again to turn filtering off.
B) Using Google Fusion tables to create the map [About Fusion tables]
- this is the probably the quickest part of the process
Once your raw data is in a tabulated form you can go to Google Fusion tables. You will need to be signed into Google to do this (or you can send your file to a Google-using friend and ask them to make the map but note that if you want to amend it later you'll have to repeat the process).
You are presented with a screen that looks like this

1. Click on Google Spreadsheets to use a file on Google Drive, or on Browse... to choose a file on your computer. I used Google so the next screen I saw asked me to choose from my spreadsheets.
2. Just click the spreadsheet you want and press 'Select'. Then wait for the sheet to load.

3. This is the point at which you can pick 'Sheet 1' or another sheet within the spreadsheet, depending on where your data is. In most cases you'll probably only have one sheet but be aware if you're uploading a file from your computer that although it will process the data from Sheet 1 (if you choose that) I think it uploads all of them so be careful if you have sensitive data in the other sheets.

4. This is the bit where it asks you to confirm what column it should use to map addresses onto the Google map. In my case it's Postcode but it could equally be something else.

5. This screen lets you finish importing the table by adding some information. Because the data came from Sherlockology I put their website in the Attribution page link and wrote a more detailed description that what is currently here. You can add more detail later once the map is made. Press Finish to get the data properly formatted in Fusion tables style.

6. This is what the final fusion table looks like - there are three tabs each presenting the same data in a different way. In 'Rows' you can see each row as in a spreadsheet, in 'Cards' you can see the data from each row presented as it would look on a business card - this is what's shown when someone clicks on a location pointer (the red dots) in the 'Map of Postcode' in tab 3.
The map isn't ready though - you need to click on that tab to bring up the 'begin geocoding' options which looks like this, below.

7. Clicking on the third tab will start the process of geocoding automatically, and once done you will see something like the map below. It's best to zoom out first to see if there are any obviously wrong map points (see the one in the US). You can click on that red dot to see its card which will tell you which row caused a problem - you may need to add in some extra detail. For example there's a Greenwich in London UK as well as one in Connecticut US.

8. Zoomed out to show that while the majority of the UK postcodes are correctly positioned at least one is in the wrong place. On a real map you can click any of the red dots to see what data point it's meant to be.
Making the red icons different colours (depending on properties)
If you've added an Icons column with different coloured icons to reflect differences in your data (in my case I've used colours to denote different types of sound systems) you will need to click on 'Change feature styles' (visible in Picture 7) and then select the Column option (basic red dots = fixed, column lets you select which column you put your icon names in, eg large_green or small_blue etc and buckets is for continuous data that you want to segment, eg Low, Medium, High).
9. Using the map feature styles option and the marker icon options to change their colour. Pick whichever column has your icon names in (you can call the columns anything you like by the way).
And here's the most recent example of the map - and I've also just spotted that yellow map icons don't work well when zoomed in though they're fine at a distance. I'm going to change them back to red!
10. Green icons show cinemas with Dolby Atmos. Blue icons show those with Dolby Surround 7.1 or Dolby 3D, yellow ones show cinemas with no Dolby system in place (according to the information from Dolby's own website, which could be out of date of course - I need to check!). I've clicked on an example and you can see that data point's 'card' with relevant info. In the next update of the map this data point should also have its own local website too, and a tidy up of the original list text (last line) where the phone numbers have got a bit mangled.
Sharing your map
At the top right of every map (or Google document in fact) there's a bright blue Share button which lets you share a link for people to view only, or for them to edit, or gives you the option of inviting people by their email addresses to view (or, in the case of the originating documents, edit the data).
C) Troubleshooting
After my first map I spotted that one of the Dublin addresses was mistakenly in Poland and the NE28 postcode of the North Shields cinema appeared in the US. Limerick doesn't use postcodes but when searching for the name of the cinema on Google it showed up fine on Google Maps. So for those ones I added 'Ireland' as a location clue, or used the name of the cinema instead. Whatever works.
D) Ongoing updates and improvements
I'll write this section when there are some :)
Friday, 17 July 2015
Spambots that favourite random tweets on Twitter - a possible (gradual) solution
I am a bit surprised that @Twitter's not suspended these accounts. They are not necessarily posting spam (mostly sharing identical tweets with photos of underdressed people) but I don't think they're contributing that much to Twitter. I've blocked all of them after they've favourited tweets of mine. I assume favouriting is to make the account look like it's engaging in 'normal Twitter behaviour'. But perhaps I am just a terrible prude ;)
There are instructions below if you want to block them in one go. I've used TweeterID to convert their Twitter names to their Twitter ID, which Twitter uses for blocklists.
There seem to be hundreds of them but here's a selection:
https://twitter.com/JuliaOconnoztj
https://twitter.com/RubyFrazieratw
https://twitter.com/LilianaMaxw8lj
https://twitter.com/SydneyCrawfdo1
https://twitter.com/Teahyunggi32172
https://twitter.com/BossSaranin
https://twitter.com/ValyaChekinev [Google search results for 'her' image - http://preview.tinyurl.com/orwp7pl]
https://twitter.com/1980Urban
https://twitter.com/v_ignatenkov - not awfully safe for work ;)
https://twitter.com/ryasnovl - OK this one might just be a webcam sort of thing
https://twitter.com/MissVariychuk
https://twitter.com/LadySlablyuk
https://twitter.com/zalymova
https://twitter.com/phili_trask
https://twitter.com/robyn_rockin1
https://twitter.com/1973Dolganova
https://twitter.com/kovaltsovl
https://twitter.com/1997_voronina
INSTRUCTIONS for spamblock2015 file
Save a copy of https://dl.dropboxusercontent.com/u/4000104/spamblock2015.csv
Delete Column B - all that should remain is a single column of numbers
Using the desktop version of Twitter log in and go to Settings / Blocked: https://twitter.com/settings/blocked
Click the 'Advanced options' link then 'import a list' then 'Attach a file to upload' - upload the file. To be honest I've no idea what happens after that!
Every so often I'll update the file with the new ones I block, filename won't change. Assuming it works if you check back and download then upload a later version of the file it will overwrite and you'll be blocking more of the spammers. I'm hoping that this might get Twitter to start suspending these accounts (in which case the list of accounts to block will actually reduce).
spamblock2015.csv file last updated 20 July 2015, 14:45 BST (prev 17 July 2015, 22:20).
There are instructions below if you want to block them in one go. I've used TweeterID to convert their Twitter names to their Twitter ID, which Twitter uses for blocklists.
There seem to be hundreds of them but here's a selection:
https://twitter.com/JuliaOconnoztj
https://twitter.com/RubyFrazieratw
https://twitter.com/LilianaMaxw8lj
https://twitter.com/SydneyCrawfdo1
https://twitter.com/Teahyunggi32172
https://twitter.com/BossSaranin
https://twitter.com/ValyaChekinev [Google search results for 'her' image - http://preview.tinyurl.com/orwp7pl]
https://twitter.com/1980Urban
https://twitter.com/v_ignatenkov - not awfully safe for work ;)
https://twitter.com/ryasnovl - OK this one might just be a webcam sort of thing
https://twitter.com/MissVariychuk
https://twitter.com/LadySlablyuk
https://twitter.com/zalymova
https://twitter.com/phili_trask
https://twitter.com/robyn_rockin1
https://twitter.com/1973Dolganova
https://twitter.com/kovaltsovl
https://twitter.com/1997_voronina
INSTRUCTIONS for spamblock2015 file
Save a copy of https://dl.dropboxusercontent.com/u/4000104/spamblock2015.csv
Delete Column B - all that should remain is a single column of numbers
Using the desktop version of Twitter log in and go to Settings / Blocked: https://twitter.com/settings/blocked
Click the 'Advanced options' link then 'import a list' then 'Attach a file to upload' - upload the file. To be honest I've no idea what happens after that!
Every so often I'll update the file with the new ones I block, filename won't change. Assuming it works if you check back and download then upload a later version of the file it will overwrite and you'll be blocking more of the spammers. I'm hoping that this might get Twitter to start suspending these accounts (in which case the list of accounts to block will actually reduce).
spamblock2015.csv file last updated 20 July 2015, 14:45 BST (prev 17 July 2015, 22:20).
Monday, 4 May 2015
RSS to Twitter - turning website updates into automated tweets, with IFTTT
Some Twitter accounts are broadcast-only (they send tweets but there
isn't a person behind the account typing out these tweets) and they're
useful for getting news feeds from various websites and sources.
There are several ways of creating one of these "bots" (Twitter robots, automated accounts) - you don't need to know how to program and you don't need your own server.
Probably the easiest way to set up such a Twitter account is to use the free IFTTT service (which stands for 'IF This, Then That'). If a website has an RSS feed (look for an orange square icon with a radiating white pattern) then you can use that to set up a system that will ping out a tweet for you.
You will need
The steps are
 If you click into the lower box it looks like this and you can click on
the blue ‘science flask’ icon to change the options, this will change
what the tweets look like.
If you click into the lower box it looks like this and you can click on
the blue ‘science flask’ icon to change the options, this will change
what the tweets look like.

There are several ways of creating one of these "bots" (Twitter robots, automated accounts) - you don't need to know how to program and you don't need your own server.
Probably the easiest way to set up such a Twitter account is to use the free IFTTT service (which stands for 'IF This, Then That'). If a website has an RSS feed (look for an orange square icon with a radiating white pattern) then you can use that to set up a system that will ping out a tweet for you.
You will need
- an input, in this case an RSS feed
- an output - a spare Twitter account
The steps are
- Create your spare Twitter account and log in
- Create an IFTTT account and log in there too
- While logged into both IFTTT and Twitter go to https://ifttt.com/twitter and activate Twitter as a channel (this will be your output) you probably won't need to activate RSS as a separate channel but just in case its https://ifttt.com/feed
#filmmusic: (Brooklyn, New York / USA) 07.10.2015 - Doctor Who Symphonic Spectacular http://t.co/DV0E1kByrn The Doctor Who Symphonic Spec…
— Movies in Concert (@moviesinconcert) May 2, 2015
Here’s what it looks like under the bonnet with the RSS feed as the
‘trigger’ causing the action of sending out a tweet. I’ve added the
hashtag #filmmusic and asked the recipe to publish this along with the
title of the update from Movies in Concert along with the address (Entry
URL) and the first line of the page. Friday, 19 December 2014
How to take screenshots
A version of this was originally posted another post about capturing tweets.
How to take screenshots
On desktop computers people may want to INCLUDE the URL in the address bar but NOT INCLUDE their bookmarks. If so they can usually use the VIEW option in their browser to temporarily hide their bookmarks toolbar (and any other toolbars) to neaten the captured image. They can also resize the entire window and use the Ctrl+- (the Ctrl or Command* key plus the hyphen key) to reduce the size of the text on the screen. Ctrl++ (Ctrl / Command and the + key) to embiggen it again :)
*Command = for Mac keyboards
To take a screenshot on a Windows desktop PC or laptop
• Look for 'Print Screen' on the keyboard which is likely to be spelled Prt Scr.
• Press it to take a picture of the entire screen or press the Alt key first and then Prt Scr to take a snapshot of just the active window.
• This silently copies an image of the screen, or part of it, to the clipboard (it doesn't send it to the printer).
If you open Paint (free with Windows) or Word you can paste it in (keyboard shortcut is Ctrl+V). In Paint you can edit the image.
To take a screenshot on a Mac laptop
Note that 'Command' = the ⌘ key
Command+Shift+3 Capture the entire screen to a file
Command+Shift+Control+3 Capture the screen to the Clipboard
Command+Shift+4 Capture a selection to a file
Command+Shift+Control+4 Capture a selection to the Clipboard
Source: http://support.apple.com/kb/ht1343
You can use the Preview tool (free with Macs) to do some basic editing of the image.
To take a screenshot on an iPhone
Press the on/off button (at the top right) and the 'home screen' button at the bottom. This will copy whatever's on your screen to your camera roll which you can then email to yourself (private) or upload to image sharing services (public).
To take a screenshot on an Android phone (v4.0 and above)
Press and hold the power and 'volume down' buttons simultaneously - h/t @ErisianLib
More at http://www.pcadvisor.co.uk/how-to/google-android/3446798/how-take-screenshot-on-android-phones-tablets/
To take a screenshot on a Samsung S3 Mini
Press and hold the 'home' and 'on/off' (power) button simultaneously - thanks to @Jackpot73 for the info.
To take a screenshot on a Windows 8.1 phone
Press 'power button' and 'volume increase/up' at the same time - info from @Flatsquid, thank you
To take a screenshot on a Sony phone
It's power and volume down simultaneously, according to @clangyandjammy - thanks
How to take screenshots
On desktop computers people may want to INCLUDE the URL in the address bar but NOT INCLUDE their bookmarks. If so they can usually use the VIEW option in their browser to temporarily hide their bookmarks toolbar (and any other toolbars) to neaten the captured image. They can also resize the entire window and use the Ctrl+- (the Ctrl or Command* key plus the hyphen key) to reduce the size of the text on the screen. Ctrl++ (Ctrl / Command and the + key) to embiggen it again :)
*Command = for Mac keyboards
To take a screenshot on a Windows desktop PC or laptop
• Look for 'Print Screen' on the keyboard which is likely to be spelled Prt Scr.
• Press it to take a picture of the entire screen or press the Alt key first and then Prt Scr to take a snapshot of just the active window.
• This silently copies an image of the screen, or part of it, to the clipboard (it doesn't send it to the printer).
If you open Paint (free with Windows) or Word you can paste it in (keyboard shortcut is Ctrl+V). In Paint you can edit the image.
To take a screenshot on a Mac laptop
Note that 'Command' = the ⌘ key
Command+Shift+3 Capture the entire screen to a file
Command+Shift+Control+3 Capture the screen to the Clipboard
Command+Shift+4 Capture a selection to a file
Command+Shift+Control+4 Capture a selection to the Clipboard
Source: http://support.apple.com/kb/ht1343
You can use the Preview tool (free with Macs) to do some basic editing of the image.
To take a screenshot on an iPhone
Press the on/off button (at the top right) and the 'home screen' button at the bottom. This will copy whatever's on your screen to your camera roll which you can then email to yourself (private) or upload to image sharing services (public).
To take a screenshot on an Android phone (v4.0 and above)
Press and hold the power and 'volume down' buttons simultaneously - h/t @ErisianLib
More at http://www.pcadvisor.co.uk/how-to/google-android/3446798/how-take-screenshot-on-android-phones-tablets/
To take a screenshot on a Samsung S3 Mini
Press and hold the 'home' and 'on/off' (power) button simultaneously - thanks to @Jackpot73 for the info.
To take a screenshot on a Windows 8.1 phone
Press 'power button' and 'volume increase/up' at the same time - info from @Flatsquid, thank you
To take a screenshot on a Sony phone
It's power and volume down simultaneously, according to @clangyandjammy - thanks
Tuesday, 14 October 2014
How to turn two columns in Excel into one without losing contents - concatenate not merge
To be honest I'd assumed the Merge function would sort that out, but no, it creates a single cell from two cells but deletes the content of one and so leaves you with half of your information. Merge is not the function you're looking for.
It turns out that it's Concatenate.
Here's a picture of what I had and what I wanted.

Obviously my first port of call was Twitter.
I used the second suggestion and it worked, hooray.

It turns out that it's Concatenate.
Here's a picture of what I had and what I wanted.
Obviously my first port of call was Twitter.
@JoBrodie make a third column and use concatenate, so basically C = concat(A,B) http://t.co/6MO2aDoZKj
— Lauren G (@geeoharee) October 14, 2014
@JoBrodie = A1 & " " & A2
— Spike (@tenbus_uk) October 14, 2014
I used the second suggestion and it worked, hooray.
Monday, 6 October 2014
If you give talks with slides you must do this one thing - because I have commanded it :) Please make your links friendly
by @JoBrodie, brodiesnotes.blogspot.com
1. Shorten links in presentation slides because...
Most normal-length web addresses are quite fiddly to write down at speed. If your talk includes a link to a website or an online document please make it easy for your audience to make a note of it within the minute and a half you have your slide visible on-screen.
Eg... the one with the green tick is easier to scribble down than the one with the red cross next to it.

If your presentation has lots of links then first create a page on your website or blog (if you don't have one there are other free suggestions below). Add all your links there, then shorten the address of that page and put that shortened link in your presentation. Your audience cannot help but be kindly disposed to you :)
You can also have that shortened link running over several slides making it easier for your audience (in fact why not say "this link will appear on several pages so if you haven't written it down don't worry").
Links in handouts / documents
If you're giving people a handout with lots of links then to save them typing each one individually a 'master' link can help here. As above, add all the links to a page and then share the link to that page. There's no need to replace the other links, people will like to see all the options and then know that they don't have to type them all in. A single link is a useful addition here, rather than a replacement as in slides.
You can also use link shortening for any individual link in your document, particularly those that are long or stretch over one line. In documents that are emailed the link may well 'work' but part of it might be cut off so the person is being sent to the wrong place. Not everyone knows to copy and paste and 'reattach' the broken address so it's helpful to pre-empt this by shortening the link first.
Getting more information from the link you've created
If you use bitly.com to shorten your links then you can see how often it's been clicked on (or typed in) - this means that you can get an overview of traffic to that page - but only the traffic that has come via your shortened link. You'll get no information about other routes in to the page.
2. Shorten links like a pro
Customise* your link.
Always customise. Ironically short gibberish links are probably worse than long ones that are comprehensible. In the example above I shortened it to 'URLette' (small URL) but the default one would have been a meaningless string of numbers and letters. Certainly quicker to write down, but not necessarily easier - use actual words if possible.
And for advanced users...
Go meta - one link to rule them all
Share one link which takes people to a page where they can find all of your mentioned links
Take your list of links, add them to a page. Take the address of the page and shorten / share that.
When sharing this single link on your slides make sure you shorten it and customise it so that it's easy for your audience to clock it quickly and write it down during the talk. It's also helpful to highlight verbally what you've done and why because there will be others in the audience who might be at future risk of giving lectures with unnecessarily long links. Teach them :)
By convention links are blue and underlined but since your audience can't click on them you are not restricted and can display them as you please. You probably don't need to include the http:// bit but it can be quite useful in directing the eye to something that looks like a link, and for the same reason blue isn't a bad idea either.
I and your future audiences thank you for this consideration.
Further reading
How I prepare presentations for giving talks (18 October 2014)
3. How to shorten your links
Go to any link shortener page, put your long link in and press 'shorten' (or equivalent) to get a smaller one. Take advantage of any customisable options as appropriate. On some (eg Bitly) you can sign in with Twitter.
http://is.gd/ (customisable (look for "Further options/custom URL") but no QR** codes)
http://v.gd/ (customisable, QR codes)
https://bitly.com/ (customisation, new QR codes no longer possible, log in optional)
https://goo.gl/ - Google (QR codes - add .qr to your generated link to get stats, but no customisation)
http://tinyurl.com/ (customisable, no QR codes)
@schrodingerskit reminded me that bitly links actually let you see the statistics relating to how often your link was viewed.
**QR codes - let people 'scan' your link from printed material
If you're going to put a link on printed material and want to save people typing things then use a QR code ('Quick Response') to let them use their phones' camera to go to the site without having to type anything in. If your URL shortener doesn't come with 'native' QR codes you can create them with other free services, such as http://www.qrstuff.com/
^For people who don't have a blog, some suggestions
There are numerous sites which let you publish a one-off page. That'll give you a link that you can then shorten / customise and share as before.
Examples include
https://woto.com/ (formerly Cloudpage)
http://sqworl.com/
Storify's not bad either https://storify.com/
If you know of other examples tell me and I'll add 'em.
1. Shorten links in presentation slides because...
Most normal-length web addresses are quite fiddly to write down at speed. If your talk includes a link to a website or an online document please make it easy for your audience to make a note of it within the minute and a half you have your slide visible on-screen.
Eg... the one with the green tick is easier to scribble down than the one with the red cross next to it.
Please shorten links if you want people to note them down
If your presentation has lots of links then first create a page on your website or blog (if you don't have one there are other free suggestions below). Add all your links there, then shorten the address of that page and put that shortened link in your presentation. Your audience cannot help but be kindly disposed to you :)
You can also have that shortened link running over several slides making it easier for your audience (in fact why not say "this link will appear on several pages so if you haven't written it down don't worry").
Links in handouts / documents
If you're giving people a handout with lots of links then to save them typing each one individually a 'master' link can help here. As above, add all the links to a page and then share the link to that page. There's no need to replace the other links, people will like to see all the options and then know that they don't have to type them all in. A single link is a useful addition here, rather than a replacement as in slides.
You can also use link shortening for any individual link in your document, particularly those that are long or stretch over one line. In documents that are emailed the link may well 'work' but part of it might be cut off so the person is being sent to the wrong place. Not everyone knows to copy and paste and 'reattach' the broken address so it's helpful to pre-empt this by shortening the link first.
Getting more information from the link you've created
If you use bitly.com to shorten your links then you can see how often it's been clicked on (or typed in) - this means that you can get an overview of traffic to that page - but only the traffic that has come via your shortened link. You'll get no information about other routes in to the page.
2. Shorten links like a pro
Customise* your link.
Always customise. Ironically short gibberish links are probably worse than long ones that are comprehensible. In the example above I shortened it to 'URLette' (small URL) but the default one would have been a meaningless string of numbers and letters. Certainly quicker to write down, but not necessarily easier - use actual words if possible.
And for advanced users...
Go meta - one link to rule them all
Share one link which takes people to a page where they can find all of your mentioned links
Take your list of links, add them to a page. Take the address of the page and shorten / share that.
When sharing this single link on your slides make sure you shorten it and customise it so that it's easy for your audience to clock it quickly and write it down during the talk. It's also helpful to highlight verbally what you've done and why because there will be others in the audience who might be at future risk of giving lectures with unnecessarily long links. Teach them :)
By convention links are blue and underlined but since your audience can't click on them you are not restricted and can display them as you please. You probably don't need to include the http:// bit but it can be quite useful in directing the eye to something that looks like a link, and for the same reason blue isn't a bad idea either.
I and your future audiences thank you for this consideration.
Further reading
How I prepare presentations for giving talks (18 October 2014)
3. How to shorten your links
Go to any link shortener page, put your long link in and press 'shorten' (or equivalent) to get a smaller one. Take advantage of any customisable options as appropriate. On some (eg Bitly) you can sign in with Twitter.
http://is.gd/ (customisable (look for "Further options/custom URL") but no QR** codes)
http://v.gd/ (customisable, QR codes)
https://bitly.com/ (customisation, new QR codes no longer possible, log in optional)
https://goo.gl/ - Google (QR codes - add .qr to your generated link to get stats, but no customisation)
http://tinyurl.com/ (customisable, no QR codes)
@schrodingerskit reminded me that bitly links actually let you see the statistics relating to how often your link was viewed.
**QR codes - let people 'scan' your link from printed material
If you're going to put a link on printed material and want to save people typing things then use a QR code ('Quick Response') to let them use their phones' camera to go to the site without having to type anything in. If your URL shortener doesn't come with 'native' QR codes you can create them with other free services, such as http://www.qrstuff.com/
^For people who don't have a blog, some suggestions
There are numerous sites which let you publish a one-off page. That'll give you a link that you can then shorten / customise and share as before.
Examples include
https://woto.com/ (formerly Cloudpage)
http://sqworl.com/
Storify's not bad either https://storify.com/
If you know of other examples tell me and I'll add 'em.
Saturday, 27 September 2014
Sharing a link to a tweet may now notify that person, some suggested workarounds
by @JoBrodie, brodiesnotes.blogspot.com (this is an update of an earlier post)
Recently I was surprised to find a tweet in my notifications page that didn't @-mention me, it got there because the tweeter had included the link of an earlier tweet that I'd sent.
I use desktop Twitter (Twitter.com) and Echofon on iPhone and have only experienced this notification on the desktop version. It seems that others have also been experiencing it for the last few weeks and it may be something that Twitter is rolling out to everyone.
What is it?
If you include in your tweet an address link that looks like this
https://twitter.com/JoBrodie/status/514147218799222784
then the person whose name is in bold may well hear about it, on their notifications page / tab.
Why is this of interest or concern to anyone?
People have previously used the method of including a tweet's address to draw attention to a tweet's content indirectly without notifying the person. When this is done to point to something that someone's said, covertly, it is sometimes known as subtweeting (the term "subtweeting" covers a range of Twitter behaviours though).
What's changed?
Previously no-one would be notified if this happened, now they will. Of course people have always been able to search your tweets, if they're public, and see what you've written anyway but it wasn't brought to their attention ('surfaced') in quite the same.
What can be done?
Firstly be aware that sharing tweet URLs now seems to be equivalent to @-mentioning them. Whether or not this is a good way of including people in a conversation or of just annoying them will depend on the circumstances but best to know that they may see it.
Assuming you want to 'subtweet' covertly then the goal is to share the URL without triggering a notification.
Below are suggestions that I think will let you send a tweet without flagging it up. Remember though that if your tweets are public the person you're 'quoting' can always see your tweets (even if you've blocked them) so this isn't a foolproof method to let anyone snark with impunity.
Some methods are a little bit fiddly. To be honest if you want to be that secretive it's probably best to email people! But this post isn't really about the practical, more about the feasible - I'm interested more in the changing ways in which the technology behind Twitter works.
1. Take a screenshot
A picture of the link or the tweet won't trigger the notification.
2. Break the address
Twitter treats web addresses (and hashtags) as clickable things - it recognises that a string of words is a web address and automatically turns it blue / underlines it, makes it clickable and makes it point to the relevant address. Just stick some characters in the link to stop this from happening - make sure that the person to whom you're sending the tweet knows how to mend it again (or the link won't work!).
For example http://www.google^^^.co^^.uk will not be recognised as http://www.google.co.uk
3. Send it by DM
Although Twitter generally doesn't let you send many links via DM it does let tweet links go through fine. (But of course you can actually send any link by DM if you break it, as outlined in 2).
4. Use DoNotLink.com
This hides the URL and means that it probably doesn't currently trigger the notification (I've tried it and it doesn't, but not tested it to destruction, and Twitter is forever tweaking things). Incidentally you can cloak any URL this way so, for example, if you want to share the link of Widget.com's page without flagging this up to Widget Co (if they have a Twitter search running on 'widget' they'd come across your tweet) you can use this.
Note that other URL shorteners (bitly, is.gd, t.co etc) fail on this front. They won't hide the link for anyone searching, though I don't know if they will or won't trigger the notification.
5. Put the tweet you want to share in a Twitlonger post (but not in the first line).
Twitlonger lets you write more of a blog post than a tweet (you just log in by authorising it to interact with your Twitter account and start writing). It then posts just the first 120 or so of your post and adds a link so that people can click and go and read the post on the Twitlonger site. If you ensure that the link you want to share is placed after 120 or so characters it won't appear in the autoposted tweet and so can't trigger anything.
6. Share the minimum info needed to recreate the tweet
This is potentially risky because you'd have to include the person's name and if they have a search for that they'll see it immediately (whether or not this method triggers a particular 'your link has been mentioned' notification - I've not tried it and I don't think it does but not certain). If you and the person know who you are talking about you only need to share the link's string of digits to recreate the link.
All tweet addresses have the same format:
http://twitter.com / NAME / status / NUMBER
- if you know the NAME and the NUMBER you can recreate any link from scratch.
For my tweet above you only need JoBrodie and 514147218799222784 to recreate the full link.
Recently I was surprised to find a tweet in my notifications page that didn't @-mention me, it got there because the tweeter had included the link of an earlier tweet that I'd sent.
I use desktop Twitter (Twitter.com) and Echofon on iPhone and have only experienced this notification on the desktop version. It seems that others have also been experiencing it for the last few weeks and it may be something that Twitter is rolling out to everyone.
What is it?
If you include in your tweet an address link that looks like this
https://twitter.com/JoBrodie/status/514147218799222784
then the person whose name is in bold may well hear about it, on their notifications page / tab.
Why is this of interest or concern to anyone?
People have previously used the method of including a tweet's address to draw attention to a tweet's content indirectly without notifying the person. When this is done to point to something that someone's said, covertly, it is sometimes known as subtweeting (the term "subtweeting" covers a range of Twitter behaviours though).
What's changed?
Previously no-one would be notified if this happened, now they will. Of course people have always been able to search your tweets, if they're public, and see what you've written anyway but it wasn't brought to their attention ('surfaced') in quite the same.
What can be done?
Firstly be aware that sharing tweet URLs now seems to be equivalent to @-mentioning them. Whether or not this is a good way of including people in a conversation or of just annoying them will depend on the circumstances but best to know that they may see it.
Assuming you want to 'subtweet' covertly then the goal is to share the URL without triggering a notification.
Below are suggestions that I think will let you send a tweet without flagging it up. Remember though that if your tweets are public the person you're 'quoting' can always see your tweets (even if you've blocked them) so this isn't a foolproof method to let anyone snark with impunity.
Some methods are a little bit fiddly. To be honest if you want to be that secretive it's probably best to email people! But this post isn't really about the practical, more about the feasible - I'm interested more in the changing ways in which the technology behind Twitter works.
Sneaky workarounds
1. Take a screenshot
A picture of the link or the tweet won't trigger the notification.
2. Break the address
Twitter treats web addresses (and hashtags) as clickable things - it recognises that a string of words is a web address and automatically turns it blue / underlines it, makes it clickable and makes it point to the relevant address. Just stick some characters in the link to stop this from happening - make sure that the person to whom you're sending the tweet knows how to mend it again (or the link won't work!).
For example http://www.google^^^.co^^.uk will not be recognised as http://www.google.co.uk
3. Send it by DM
Although Twitter generally doesn't let you send many links via DM it does let tweet links go through fine. (But of course you can actually send any link by DM if you break it, as outlined in 2).
4. Use DoNotLink.com
This hides the URL and means that it probably doesn't currently trigger the notification (I've tried it and it doesn't, but not tested it to destruction, and Twitter is forever tweaking things). Incidentally you can cloak any URL this way so, for example, if you want to share the link of Widget.com's page without flagging this up to Widget Co (if they have a Twitter search running on 'widget' they'd come across your tweet) you can use this.
Note that other URL shorteners (bitly, is.gd, t.co etc) fail on this front. They won't hide the link for anyone searching, though I don't know if they will or won't trigger the notification.
5. Put the tweet you want to share in a Twitlonger post (but not in the first line).
Twitlonger lets you write more of a blog post than a tweet (you just log in by authorising it to interact with your Twitter account and start writing). It then posts just the first 120 or so of your post and adds a link so that people can click and go and read the post on the Twitlonger site. If you ensure that the link you want to share is placed after 120 or so characters it won't appear in the autoposted tweet and so can't trigger anything.
6. Share the minimum info needed to recreate the tweet
This is potentially risky because you'd have to include the person's name and if they have a search for that they'll see it immediately (whether or not this method triggers a particular 'your link has been mentioned' notification - I've not tried it and I don't think it does but not certain). If you and the person know who you are talking about you only need to share the link's string of digits to recreate the link.
All tweet addresses have the same format:
http://twitter.com / NAME / status / NUMBER
- if you know the NAME and the NUMBER you can recreate any link from scratch.
For my tweet above you only need JoBrodie and 514147218799222784 to recreate the full link.
Sunday, 14 September 2014
How to copy and paste file paths in Mac Finder
by @JoBrodie, brodiesnotes.blogspot.com
This is how I did it, on my set up. Your set up may vary and you might need to tweak things.
First catch your file path - copy
Troubleshooting
These are the websites I used to find out how to do this, there are other suggestions in them so if this doesn't work have a look there and hopefully something else will. I found both by typing into Google Finder Mac copy path and Finder Mac paste path
When do I use this?
Since I don't see people regularly complaining about how fiddly this is and since I do these types of keystrokes constantly I have to assume that I'm in a minority so if anyone's wondering "what on earth do you want to do that for?" here's why.
Sometimes I want to save to 'Folder X' a new file that's arrived by email attachment. When I use the 'save as' option on the attached file the saving location the system currently points to may be a different folder (ie whatever I used last).
This doesn't worry me in the least on a PC as it's literally the work of sub-seconds to copy the file path (C:/blah/blah/blah/FolderX) from the File Manager ('Windows Explorer') that I already had open, paste it into the location option in the 'save as' window, hit return and let the new file join its folder-mates successfully.
It doesn't seem to be the work of seconds on a Mac and I've been (a) saving stuff to do in the office on my 'real' computer or (b) bludgeoning my way through it by just double-clicking each sodding folder to get to where I want to save it, while cursing.
I've found the above workaround, it's still not as efficient as Windows (and of course now I have to remember a bunch of new key strokes to do it) but it seems to work.
This is so ridiculously easy on a PC with Windows 7 and is one of only several reasons that my next laptop wil be Windows and not a Mac. Others include the fact that the 'Paint' equivalent seems to be unusable, 'Notepad' is OK but I don't like it very much and the lack of a forward delete key is almost defenestration-worthy. Mildly more fiddly to get a # symbol too. Oh and 'Print Screen' on a PC is a single button click whereas on a Mac you have to click four to capture the screen or window in a format that you can then paste (ie one that has been copied to the clipboard). I think it's only three if you want to save it to the desktop. Possibly the other way round, don't really care, awful ;)
This is how I did it, on my set up. Your set up may vary and you might need to tweak things.
First catch your file path - copy
- Open Finder and select the folder you're interested in saving stuff to, eg Me/Files/Folder/Subfolder
- a neat trick I spotted, on doing the below, is that if there's a subsubfolder it it's better to get the file path from that (for some delightful reason the Mac ignores the folder you're currently in and gives you the file path for the one above it, so if you really want the one you're in, go one level down). - So go to Me/Files/Folder/Subfolder/subsubfolder and select subsubfolder (or any other file within Subfolder if you don't have a convenient subsubfolder)
- Command Left-mouse-click will bring up the Options, look for 'Get Info' and click that
- Copy and paste everything that appears in 'Where', it will have lots of /s in it
- Save your file as Save as and then in the 'Save file as'* window that opens up, click Command+Shift+G - this brings up an option to 'Go to the folder..' - at which point paste your folder's file path in and hit enter.
- You'll now be either in the folder you want, or no more than one away from it.
- Good luck.
Troubleshooting
These are the websites I used to find out how to do this, there are other suggestions in them so if this doesn't work have a look there and hopefully something else will. I found both by typing into Google Finder Mac copy path and Finder Mac paste path
When do I use this?
Since I don't see people regularly complaining about how fiddly this is and since I do these types of keystrokes constantly I have to assume that I'm in a minority so if anyone's wondering "what on earth do you want to do that for?" here's why.
Sometimes I want to save to 'Folder X' a new file that's arrived by email attachment. When I use the 'save as' option on the attached file the saving location the system currently points to may be a different folder (ie whatever I used last).
This doesn't worry me in the least on a PC as it's literally the work of sub-seconds to copy the file path (C:/blah/blah/blah/FolderX) from the File Manager ('Windows Explorer') that I already had open, paste it into the location option in the 'save as' window, hit return and let the new file join its folder-mates successfully.
It doesn't seem to be the work of seconds on a Mac and I've been (a) saving stuff to do in the office on my 'real' computer or (b) bludgeoning my way through it by just double-clicking each sodding folder to get to where I want to save it, while cursing.
I've found the above workaround, it's still not as efficient as Windows (and of course now I have to remember a bunch of new key strokes to do it) but it seems to work.
This is so ridiculously easy on a PC with Windows 7 and is one of only several reasons that my next laptop wil be Windows and not a Mac. Others include the fact that the 'Paint' equivalent seems to be unusable, 'Notepad' is OK but I don't like it very much and the lack of a forward delete key is almost defenestration-worthy. Mildly more fiddly to get a # symbol too. Oh and 'Print Screen' on a PC is a single button click whereas on a Mac you have to click four to capture the screen or window in a format that you can then paste (ie one that has been copied to the clipboard). I think it's only three if you want to save it to the desktop. Possibly the other way round, don't really care, awful ;)
Friday, 27 June 2014
How to create a clickable image for Wordpress dot com sidebars
Updated 9 July 2014 - now with instructions for Blogger / blogspot blogs
Sometimes campaigning or events-promoting websites include a call to "please add our button / widget to your website". There's a piece of code made available and if you put it in the right bit of your website's layout it will appear as a clickable image.
You can see an example on the right hand side of this blog for the Open Air Cinema listings page on this site. The original one I made was for one of my work websites, see the Computing At School logo example I created for my work: Teaching London Computing).
What's the benefit of this? Why do it?
You will need
A picture - I've generally assumed that if I'm advertising someone's event then it's probably OK to use their logo or a relevant advertise-y image from their website, but it's wise to check, please don't steal others' work.
A link - when people click on the picture what website do you want them to go to? Might be an Eventbrite page, or might be an event info landing page which then directs them to the Eventbrite page.
A wordpress.com website or Blogger blog
1. The process - for Wordpress.com blogs (where they call them widgets)
• Get your picture (see 'first catch your picture' below if you don't have one)
• Make a note of the web address you want visitors to go to (when they click the picture)
• Add the picture to the Media library of your Wordpress site - then Edit the picture (not really, you just want to open the editing window from which you can capture the media file's address - you'll need it in a moment)
• Now you have two addresses (one's a Wordpress Media file store address, one's the site you want visitors to go to)
• Open the Widget settings [just stick /wp-admin/widgets.php after your website's homepage name].
• The widget you want (see pic below) is called "Image: Display an image in your sidebar" - you'll need to click and drag it to the relevant sidebar (or footer) section before you can enter the picture and link. The sidebars are the blocks to the right of your website text and usually include things like recent posts (archives) - you can add all sorts of stuff to them.
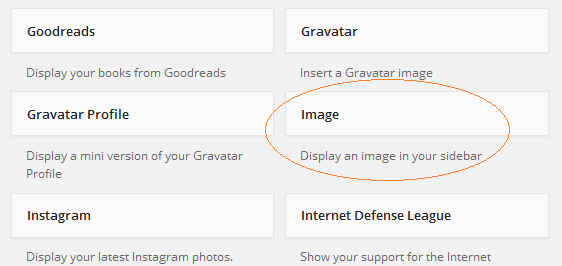
• Once you've done that the Image widget will open and ask you for information - you only need to tell it two things. (1) Where to find the image (see pic below: into the box with the *green star paste in the file's address (the Media library address^) - this will make sure the widget displays your image). (2) The address that the image will point to (ie when visitors click on it, where they'll go). In the pic below put the website address in the box with the *blue star. Then click save and have a look at your homepage to see if it's there.
^Getting the media library address for your picture
Navigate to your Media Library or just stick /wp-admin/upload.php after the end of your blog's homepage address and that should take you there. I see a large grid of media that I've uploaded including documents, pictures etc. Click on any of them and it will open up within the screen (you can close it with the little X on the right hand side, don't use the back button or you may go somewhere else). Collect the relevant address from the field marked URL in the panel on the right hand side - that's what you'll put into the Image URL field starred in green below.

2. The process - for Blogger / blogspot blogs (where they call them gadgets)
• Get your picture (see 'first catch your picture' below if you don't have one)
• Make a note of the web address you want visitors to go to (when they click the picture)
• Visit your dashboard, in particular your layout, which looks like this, then click on 'Add a Gadget' (highlighted in green below).

• There's a wide range of available gadgets but the relevant one is 'Image' - click the white on blue plus symbol to select it.

• Doing that will bring up the 'edit gadget' options, it looks like this. On the left is the blank version and on the right is a completed example.
 You'll need to give it a title (red star) and the web address you want visitors to land on when they click the picture goes in the Link bit (orange star). Up to you how you get the image in, you can upload it using the Browse button, but if it's on the internet you can link to it* (blue star). I recommend selecting the Shrink to fit button (yellow star) especially if it's a large file that will take up space.
*remember when linking to an image on the internet link to it directly, NOT the page on which it sits - ie the web address probably ends in .jpg rather than .html.
Afterwards you can decide the order (where abouts on the page the image will appear) in the layout. Then save your new arrangement and check how it looks on the live blog.
First catch your image
If you're on a website with an image you like (and be mindful of copyright and how you're using it) then right click / save as to capture a copy before uploading it to your Media library [add /wp-admin/media-new.php to the end of your website's homepage].
For previous ones (events now finished, pics removed) on this blog I used an event flyer PDF and reduced it in size so that I could take a screenshot of it, tidy it up a bit in Paint and save it as an image file which I then uploaded. I also used it on another blog (Sound stuff) along with two other music events, picture reproduced below.
 Music from the films
For this one I took a screenshot of the page which had this as part of a larger image and cut it down in Paint. I copied the logo and used PowerPoint to reduce it in size - it's a better programme for resizing things because you can hold the shift key and maintain aspect ratio (keeps height and width in correct ratio to one another, it's possible to do this in Paint but I've found PowerPoint's better). I used Paint to paste the logo onto the image and arrange it as seen.
Delicious film
I found an image of Delicious on the film's Eventbrite page, along with the phrase "UK premiere" - took a screenshot of the whole page and edited it Paint so that the words sat at the bottom of the image.
David Arnold live in concert
This one comes from the official event flyer PDF - I just opened it, resized it to about 50% (really any size will do that makes it easy for you to take a screenshot), took a screenshot of the page and got rid of white space and grey background, neatened it up so that it had a black border and save it as an image file.
The picture will be resized the minute you put it into the Image widget anyway so best to start large so that when reduced the text isn't a complete blur.
Troubleshooting
Depending on the theme you have it may not be possible or practical to have a sidebar or anywhere to put the image widget, I'm afraid I can't help with that.
Possible questions
Can I link it to a file, eg a Word document or PDF?
Yes - all you'll need then is the address of the file instead - since you can add documents to your media library on wordpress you might as well do that, but any link that opens the doc will do (eg if it's hosted somewhere else).
Sometimes campaigning or events-promoting websites include a call to "please add our button / widget to your website". There's a piece of code made available and if you put it in the right bit of your website's layout it will appear as a clickable image.
- But what if there isn't a widget available and you want to add one?
- Also, what happens if you're using Wordpress dot com (not the self-hosted dot org version) and won't be able to add a bit of code anyway?
You can see an example on the right hand side of this blog for the Open Air Cinema listings page on this site. The original one I made was for one of my work websites, see the Computing At School logo example I created for my work: Teaching London Computing).
What's the benefit of this? Why do it?
- Every time any page on your site loads the clickable image is available on the sidebar, meaning that more people might see it.
- If, as part of a promotional campaign, lots of people have the same image in their sidebars then this obviously increases the numbers of people that might see it (and some may click on it).
- The more links there are to a particular site the more this tells Google (which indexes all of the blogs and websites that are linking to it) that the target site is of value. Apparently high-ranking blogs and websites will increase this further but you can never tell what algorithm Google is working with so I'd not rely on that.
You will need
A picture - I've generally assumed that if I'm advertising someone's event then it's probably OK to use their logo or a relevant advertise-y image from their website, but it's wise to check, please don't steal others' work.
A link - when people click on the picture what website do you want them to go to? Might be an Eventbrite page, or might be an event info landing page which then directs them to the Eventbrite page.
A wordpress.com website or Blogger blog
1. The process - for Wordpress.com blogs (where they call them widgets)
• Get your picture (see 'first catch your picture' below if you don't have one)
• Make a note of the web address you want visitors to go to (when they click the picture)
• Add the picture to the Media library of your Wordpress site - then Edit the picture (not really, you just want to open the editing window from which you can capture the media file's address - you'll need it in a moment)
• Now you have two addresses (one's a Wordpress Media file store address, one's the site you want visitors to go to)
• Open the Widget settings [just stick /wp-admin/widgets.php after your website's homepage name].
• The widget you want (see pic below) is called "Image: Display an image in your sidebar" - you'll need to click and drag it to the relevant sidebar (or footer) section before you can enter the picture and link. The sidebars are the blocks to the right of your website text and usually include things like recent posts (archives) - you can add all sorts of stuff to them.
• Once you've done that the Image widget will open and ask you for information - you only need to tell it two things. (1) Where to find the image (see pic below: into the box with the *green star paste in the file's address (the Media library address^) - this will make sure the widget displays your image). (2) The address that the image will point to (ie when visitors click on it, where they'll go). In the pic below put the website address in the box with the *blue star. Then click save and have a look at your homepage to see if it's there.
^Getting the media library address for your picture
Navigate to your Media Library or just stick /wp-admin/upload.php after the end of your blog's homepage address and that should take you there. I see a large grid of media that I've uploaded including documents, pictures etc. Click on any of them and it will open up within the screen (you can close it with the little X on the right hand side, don't use the back button or you may go somewhere else). Collect the relevant address from the field marked URL in the panel on the right hand side - that's what you'll put into the Image URL field starred in green below.
2. The process - for Blogger / blogspot blogs (where they call them gadgets)
• Get your picture (see 'first catch your picture' below if you don't have one)
• Make a note of the web address you want visitors to go to (when they click the picture)
• Visit your dashboard, in particular your layout, which looks like this, then click on 'Add a Gadget' (highlighted in green below).
• There's a wide range of available gadgets but the relevant one is 'Image' - click the white on blue plus symbol to select it.
• Doing that will bring up the 'edit gadget' options, it looks like this. On the left is the blank version and on the right is a completed example.
*remember when linking to an image on the internet link to it directly, NOT the page on which it sits - ie the web address probably ends in .jpg rather than .html.
Afterwards you can decide the order (where abouts on the page the image will appear) in the layout. Then save your new arrangement and check how it looks on the live blog.
First catch your image
If you're on a website with an image you like (and be mindful of copyright and how you're using it) then right click / save as to capture a copy before uploading it to your Media library [add /wp-admin/media-new.php to the end of your website's homepage].
For previous ones (events now finished, pics removed) on this blog I used an event flyer PDF and reduced it in size so that I could take a screenshot of it, tidy it up a bit in Paint and save it as an image file which I then uploaded. I also used it on another blog (Sound stuff) along with two other music events, picture reproduced below.
For this one I took a screenshot of the page which had this as part of a larger image and cut it down in Paint. I copied the logo and used PowerPoint to reduce it in size - it's a better programme for resizing things because you can hold the shift key and maintain aspect ratio (keeps height and width in correct ratio to one another, it's possible to do this in Paint but I've found PowerPoint's better). I used Paint to paste the logo onto the image and arrange it as seen.
Delicious film
I found an image of Delicious on the film's Eventbrite page, along with the phrase "UK premiere" - took a screenshot of the whole page and edited it Paint so that the words sat at the bottom of the image.
David Arnold live in concert
This one comes from the official event flyer PDF - I just opened it, resized it to about 50% (really any size will do that makes it easy for you to take a screenshot), took a screenshot of the page and got rid of white space and grey background, neatened it up so that it had a black border and save it as an image file.
The picture will be resized the minute you put it into the Image widget anyway so best to start large so that when reduced the text isn't a complete blur.
Troubleshooting
Depending on the theme you have it may not be possible or practical to have a sidebar or anywhere to put the image widget, I'm afraid I can't help with that.
Possible questions
Can I link it to a file, eg a Word document or PDF?
Yes - all you'll need then is the address of the file instead - since you can add documents to your media library on wordpress you might as well do that, but any link that opens the doc will do (eg if it's hosted somewhere else).
Subscribe to:
Posts (Atom)



 Posts
Posts

